THIS IS A DEMO STORE, YOU WON'T BE CHARGED. U:Test P:funkytest111@
Documentation
WordPress & Woo
Learn how to setup WordPress and Woo for the system.
This covers everything that needs to be set in WordPress to complete the setup processes, as well as to organise and help to understand the projects ecosystem and mechanics.
- 1. WordPress configuration
- 1. Required theme & plugins* – first setup up the following in this order:
- 1.1. Headless Previews theme – install and activate
- 1.2. Headless Mods plugin – install and activate
- 1.3. Dependency plugins – first download and install all required, then activate in the correct order
- 2. Create and set a homepage as a static page in WordPress reading options.
- 3. Set discourage search engines in WordPress reading options to prevent backend being indexed.
- 4. Whitelabel and hardening – secure login options.
- 5. Add post and shop pages with ‘shop’ slug and ‘blog’ slug for blog page and set them in the reading options properly as posts / shop pages.
- 6. Add 404 page
- 7. Set default language with polylang and assign content
- 1. Required theme & plugins* – first setup up the following in this order:
- 2. Woo configuration
- 2.1. Draft required woo pages – theme handles them
- account
- cart
- checkout
- 2.2. Currency settings – important for calculation done properly
- Set separator to dot
. - Symbol to right
- Get code and symbol for .env f.e. PLN – zł
- 2 numbers of decimals
- Set separator to dot
- 2.3 Shipping zones
- Set shipping costs and countries both in general and in further shipping options of woo
- 2.4 Advanced
- 2.1. Draft required woo pages – theme handles them
- 3. Editing wp-config.php file
- 4. Setting GraphQL endpoint
1. WordPress settings for headless e-commerce
1.1. Set up required theme & plugins
Start with uploading and activating the Headless Previews theme, then Headless Mods plugin as main dependencies.
This is a blank starter preview theme for headless websites, it lets You modify the WordPress backend using custom functions and php as well as supports Tailwind CSS in the editor on drafts of posts.
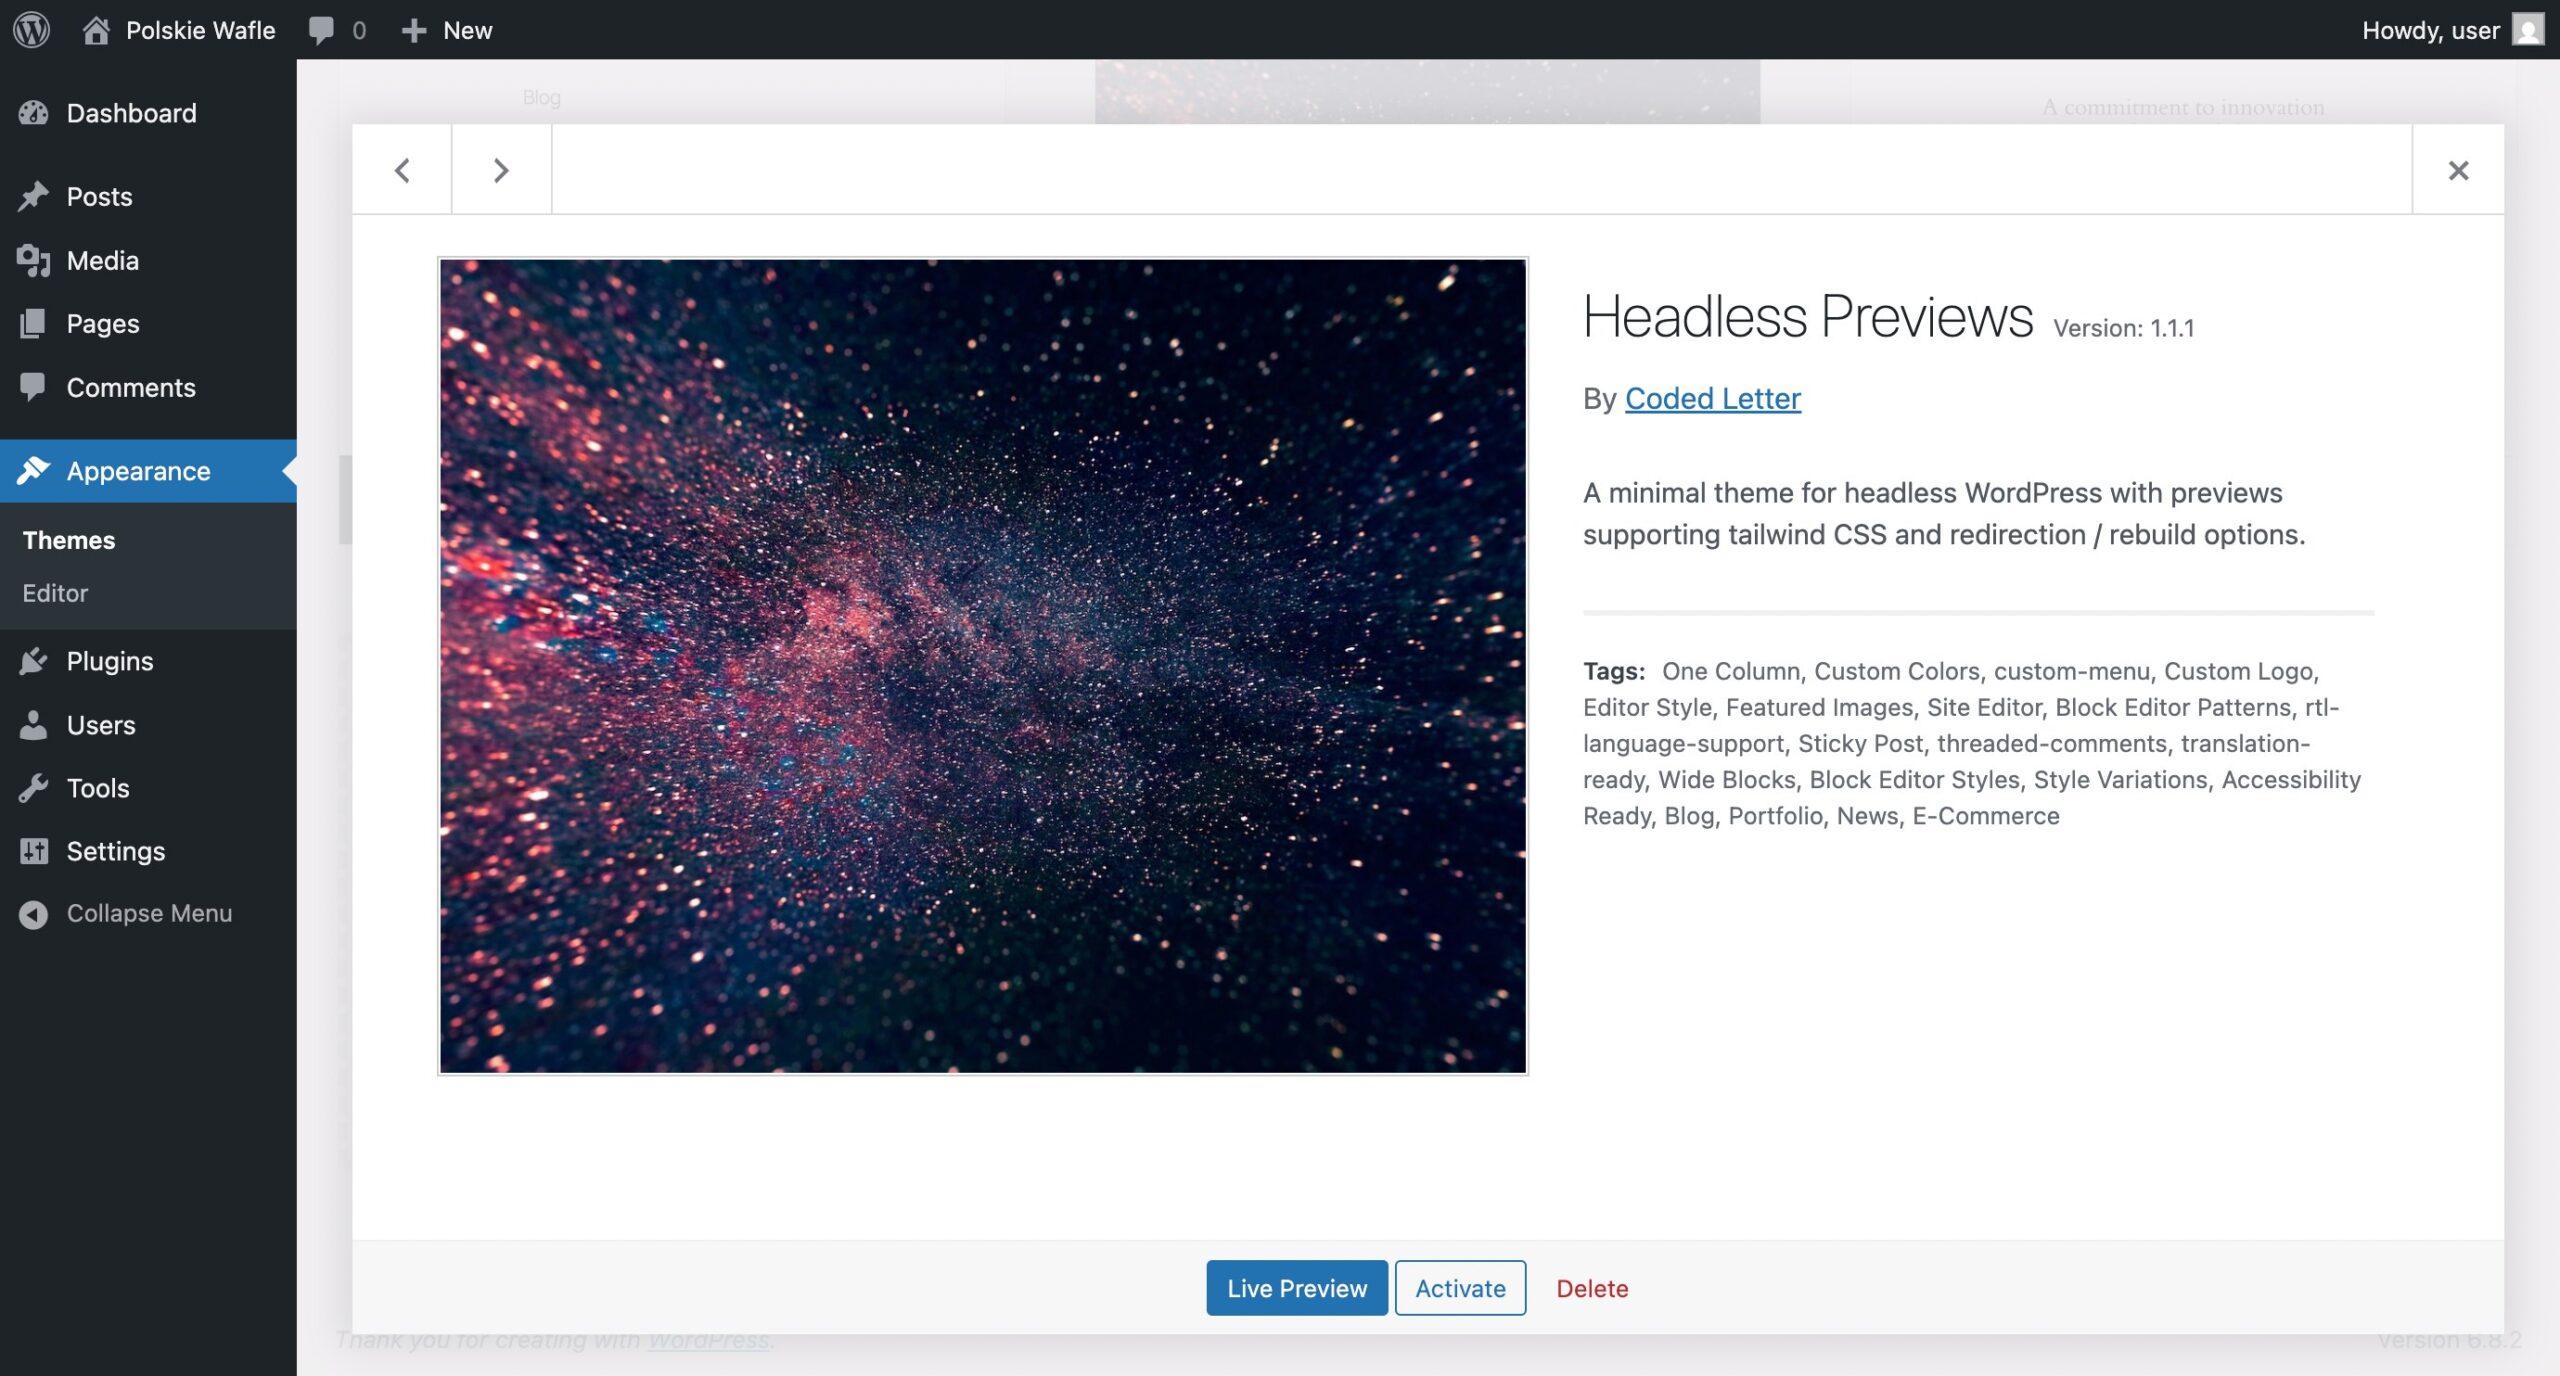
Go to themes -> upload new -> upload the .zip file downloaded from here, the do the same for the plugin under plugins, activate the headless theme and plugin instantly.

Then go to Plugins -> Headless Dependencies screen from the left admin menu, where You will find the required plugins for everything to work smoothly, with download links and install status.

First download all the required plugins, second install them using Plugins -> Add Plugin -> upload .zip, third activate them in this order, you can get all the required plugins at this page, you can refer to each plugin’s official documentation for more details.
- 1. WooCommerce
- 2. WooCommerce Stripe Gateway
- 3. Advanced Custom Fields
- 4. WPGraphQL
- 5. WP Gatsby
- 6. WPGraphQL WooCommerce
- 7. WPGraphQL JWT Authentication – Note: Needs wp-config.php edit later
- 8. WPGraphQL for ACF
- 9. Polylang
- 10. Polylang for WooCommerce* – Note: Requires extra license – for > 1 language e-commerce case
- 11. WP GraphQL Polylang
- 12. ACF Options for Polylang
- 13. Mailgun*
- 14. WPGraphQL CORS* – enables extra layer of security
- 15. WPGraphQL Smart Cache* – note: after setting up the options
- 16. Yoast SEO* (not fully covered yet – coming soon)
- 17. WPGraphQL Yoast Seo* (not fully covered yet – coming soon)
*Optional – can be set later, otherwise required.
After You install and activate the minimum requirements as shown below on the screen You are ready to start developing, the dependencies manager will help You not mess anything up while updating, you can now safely auto-update the plugins that have this option.

Note: After activating the plugins run the Woo and Polylang setups, remember to assign the content to a language if no language is set and set a language for the content.
1.2. Create and set a static homepage
The static homepage will hold customisation options for each language of the theme, make sure You have a page published, then go to Settings -> reading settings -> Use static homepage
You need also to set the posts page (and leave it at /blog/ slug) from the reading settings and the theme will render a default /blog/ page automatically with the top section editable.
To work properly the theme needs a static homepage set for each language. Make sure You set them before trying anything.
1.3. Discourage search engines for the backend
Also set the backend to be discouraged by search engines, as You don’t want it to be indexed this is fine, as Your frontend gatsby part will rank better for SEO.
It’s a good practice to also set the desired permalinks structure at the start.
Note: Permalink settings – changes to all permalinks are fully supported
Note: Do not set anything in the WPGatsby settings under Settings > GatsbyJS as this is deprecated. It will be removed in the future update.

1.4. White label login and hardening
The white-label login to the backend and other security improvements are introduced at the bottom of the admin menu under Secure Login
You can change the default /wp-login.php endpoint to a custom one, for instance custom-login.php will be the new endpoint when the headless mods plugins is active. You can customize the logo and colors also.
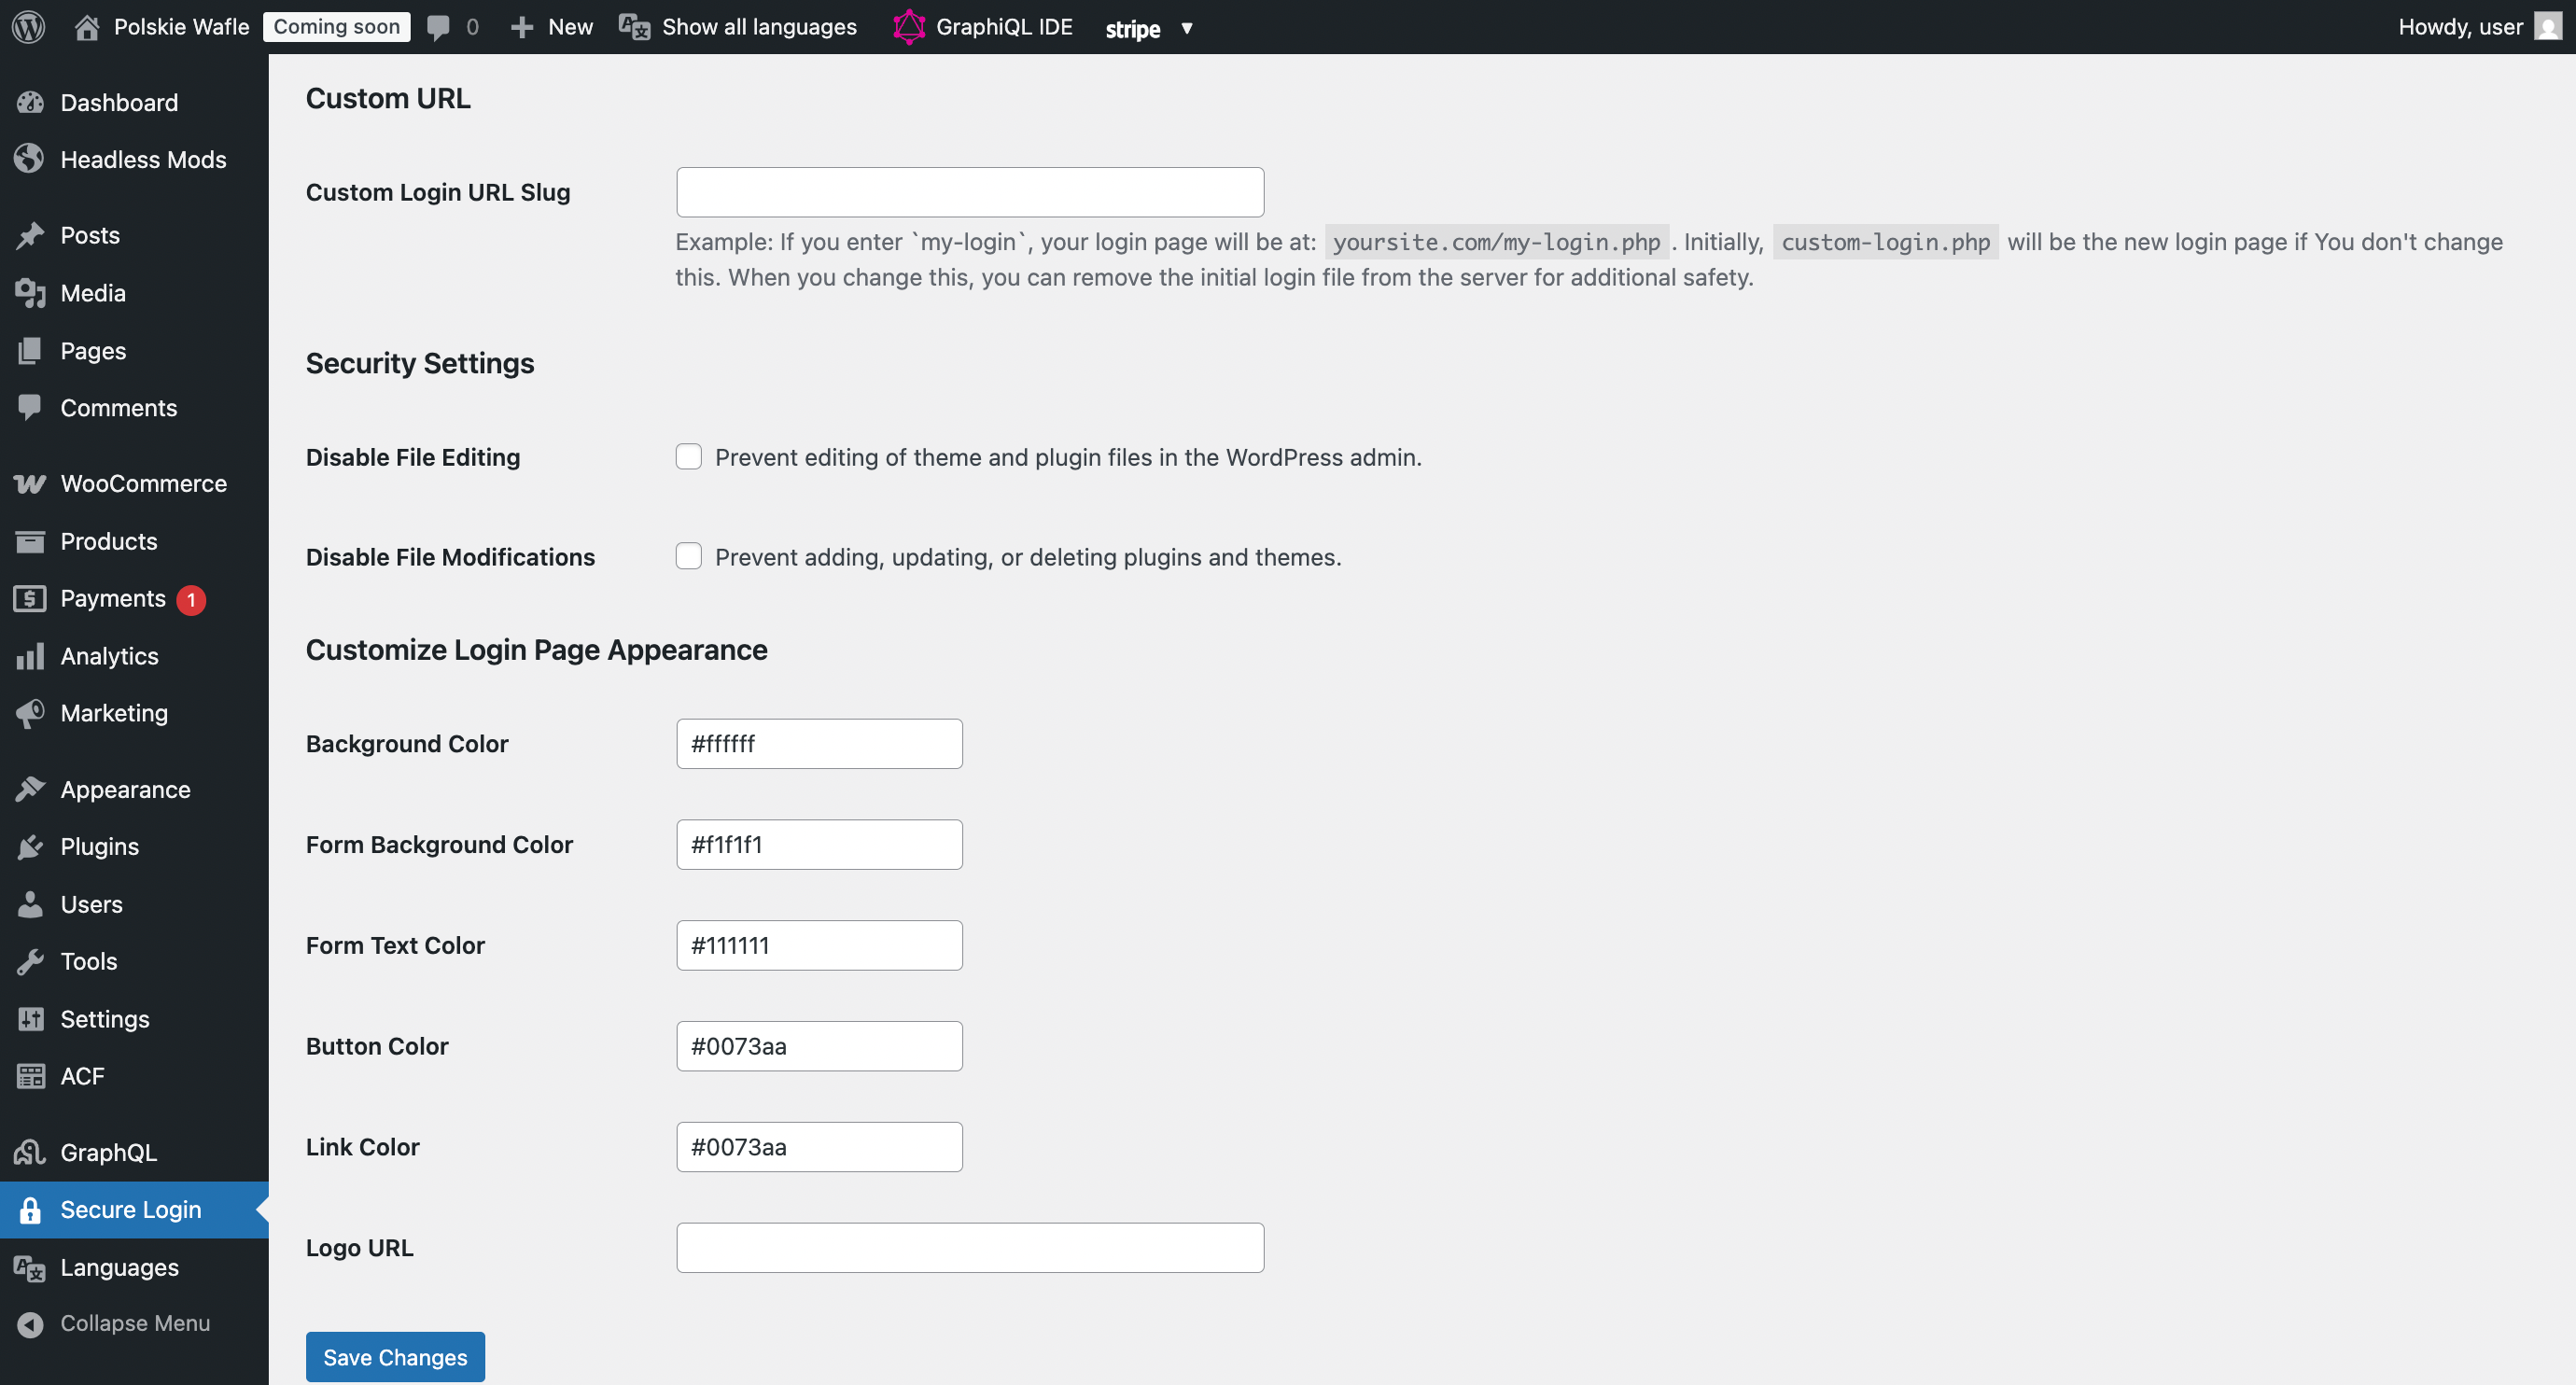
There are also two more options that will block edits and modifications to security critical points like plugins and themes, checking the boxes will apply those modifications (turning off plugin / theme updates and modifications).
Note: It is a good practice to turn them off once in a while to handle stable updates.
2. Headless Woo configuration
2.1. Setting required woo pages to drafts
It is required that those Woo pages are set to draft as the theme will handle them independently and having them published will result in a name conflict. You can also delete them but woo will complain, so a draft is an optimal solution.
- 1. My account – /my-account/ – draft
- 2. Checkout – /checkout/ – draft
- 3. Cart – /cart/ – draft
- 4. Shop – /shop/ – present (top section editable)
The homepage needs to be set and published, any other pages will generate during builds at the set urls. If You want to modify these pages, changes to code need to be applied.

2.2. Currency settings
Any currency is allowed, but some payment methods will change depending on it. You need to pass the two values to .env file to synchronise the calculations for frontend setup. Also make sure these settings are applied:
- 1. Currency format should be set to right without space format
- 2. Thousand separator should be empty
- 3. Decimal separator should be a dot “.” (important for calculations)
- 4. Number of decimals equal to 2
2.3. Shipping zones
We need to add a valid shipping zone for the theme to calculate shipping properly.
Go to Woocommerce -> Settings -> Shipping zones, then add a shipping zone for all countries You ship to. The shipping costs will be automatically calculated during checkout based on the input shipping adress.
2.4. Advanced
The followed settings are suggested under Woocommerce > Settings > Advanced:
- 1. Order data storage – WordPress posts storage (legacy) – required.
- Enable compatibility mode ON (Synchronize orders between High-performance order storage and WordPress posts storage).
- 2. Order Attribution – unchecked – not supported, you have it covered in analytics with the data layer
3. Edit wp-config.php
It is recommended to add those definitions variables in the file for development best practices and to prevent timeouts and errors, open Your wp-config.php file with a text editor and add the following lines changing the YOUR_SECRET_SALT_KEY to an actual salt key.
You can generate a secret salt key here.
// Best practices for headless setup
define('GRAPHQL_JWT_AUTH_SECRET_KEY','YOUR_SECRET_SALT_KEY');
4. Configure GraphQL endpoint.
Go to WordPress, left admin menu: GraphQL -> Settings -> WPGraphQL General Settings
Configure useful settings for Your backend server communication.
Prepare these two values for the next steps:
GATSBY_WPGRAPHQL_URL=https://backend.your-domain.com/graphql
GATSBY_BACKEND_DOMAIN=backend.your-domain.com
Note: https://your-backend-domain.com/graphql or https://backend.your-domain.com/graphql – will be the default, can be configured also with subdomain as shown above for lower costs. (note the proper production needs https protocol, for development http can be provided.