THIS IS A DEMO STORE, YOU WON'T BE CHARGED. U:Test P:funkytest111@
Documentation
Setting up CI/CD with Netlify
Learn how to configure devOps pipeline with netlify
Set up Your own CI / CD infrastructure with Github and Netlify to take control of Your usage, costs and limits.
Note: Fork repo with code first – access granted is required first
- Log in to netlify
- Create a new project
- Choose github provider
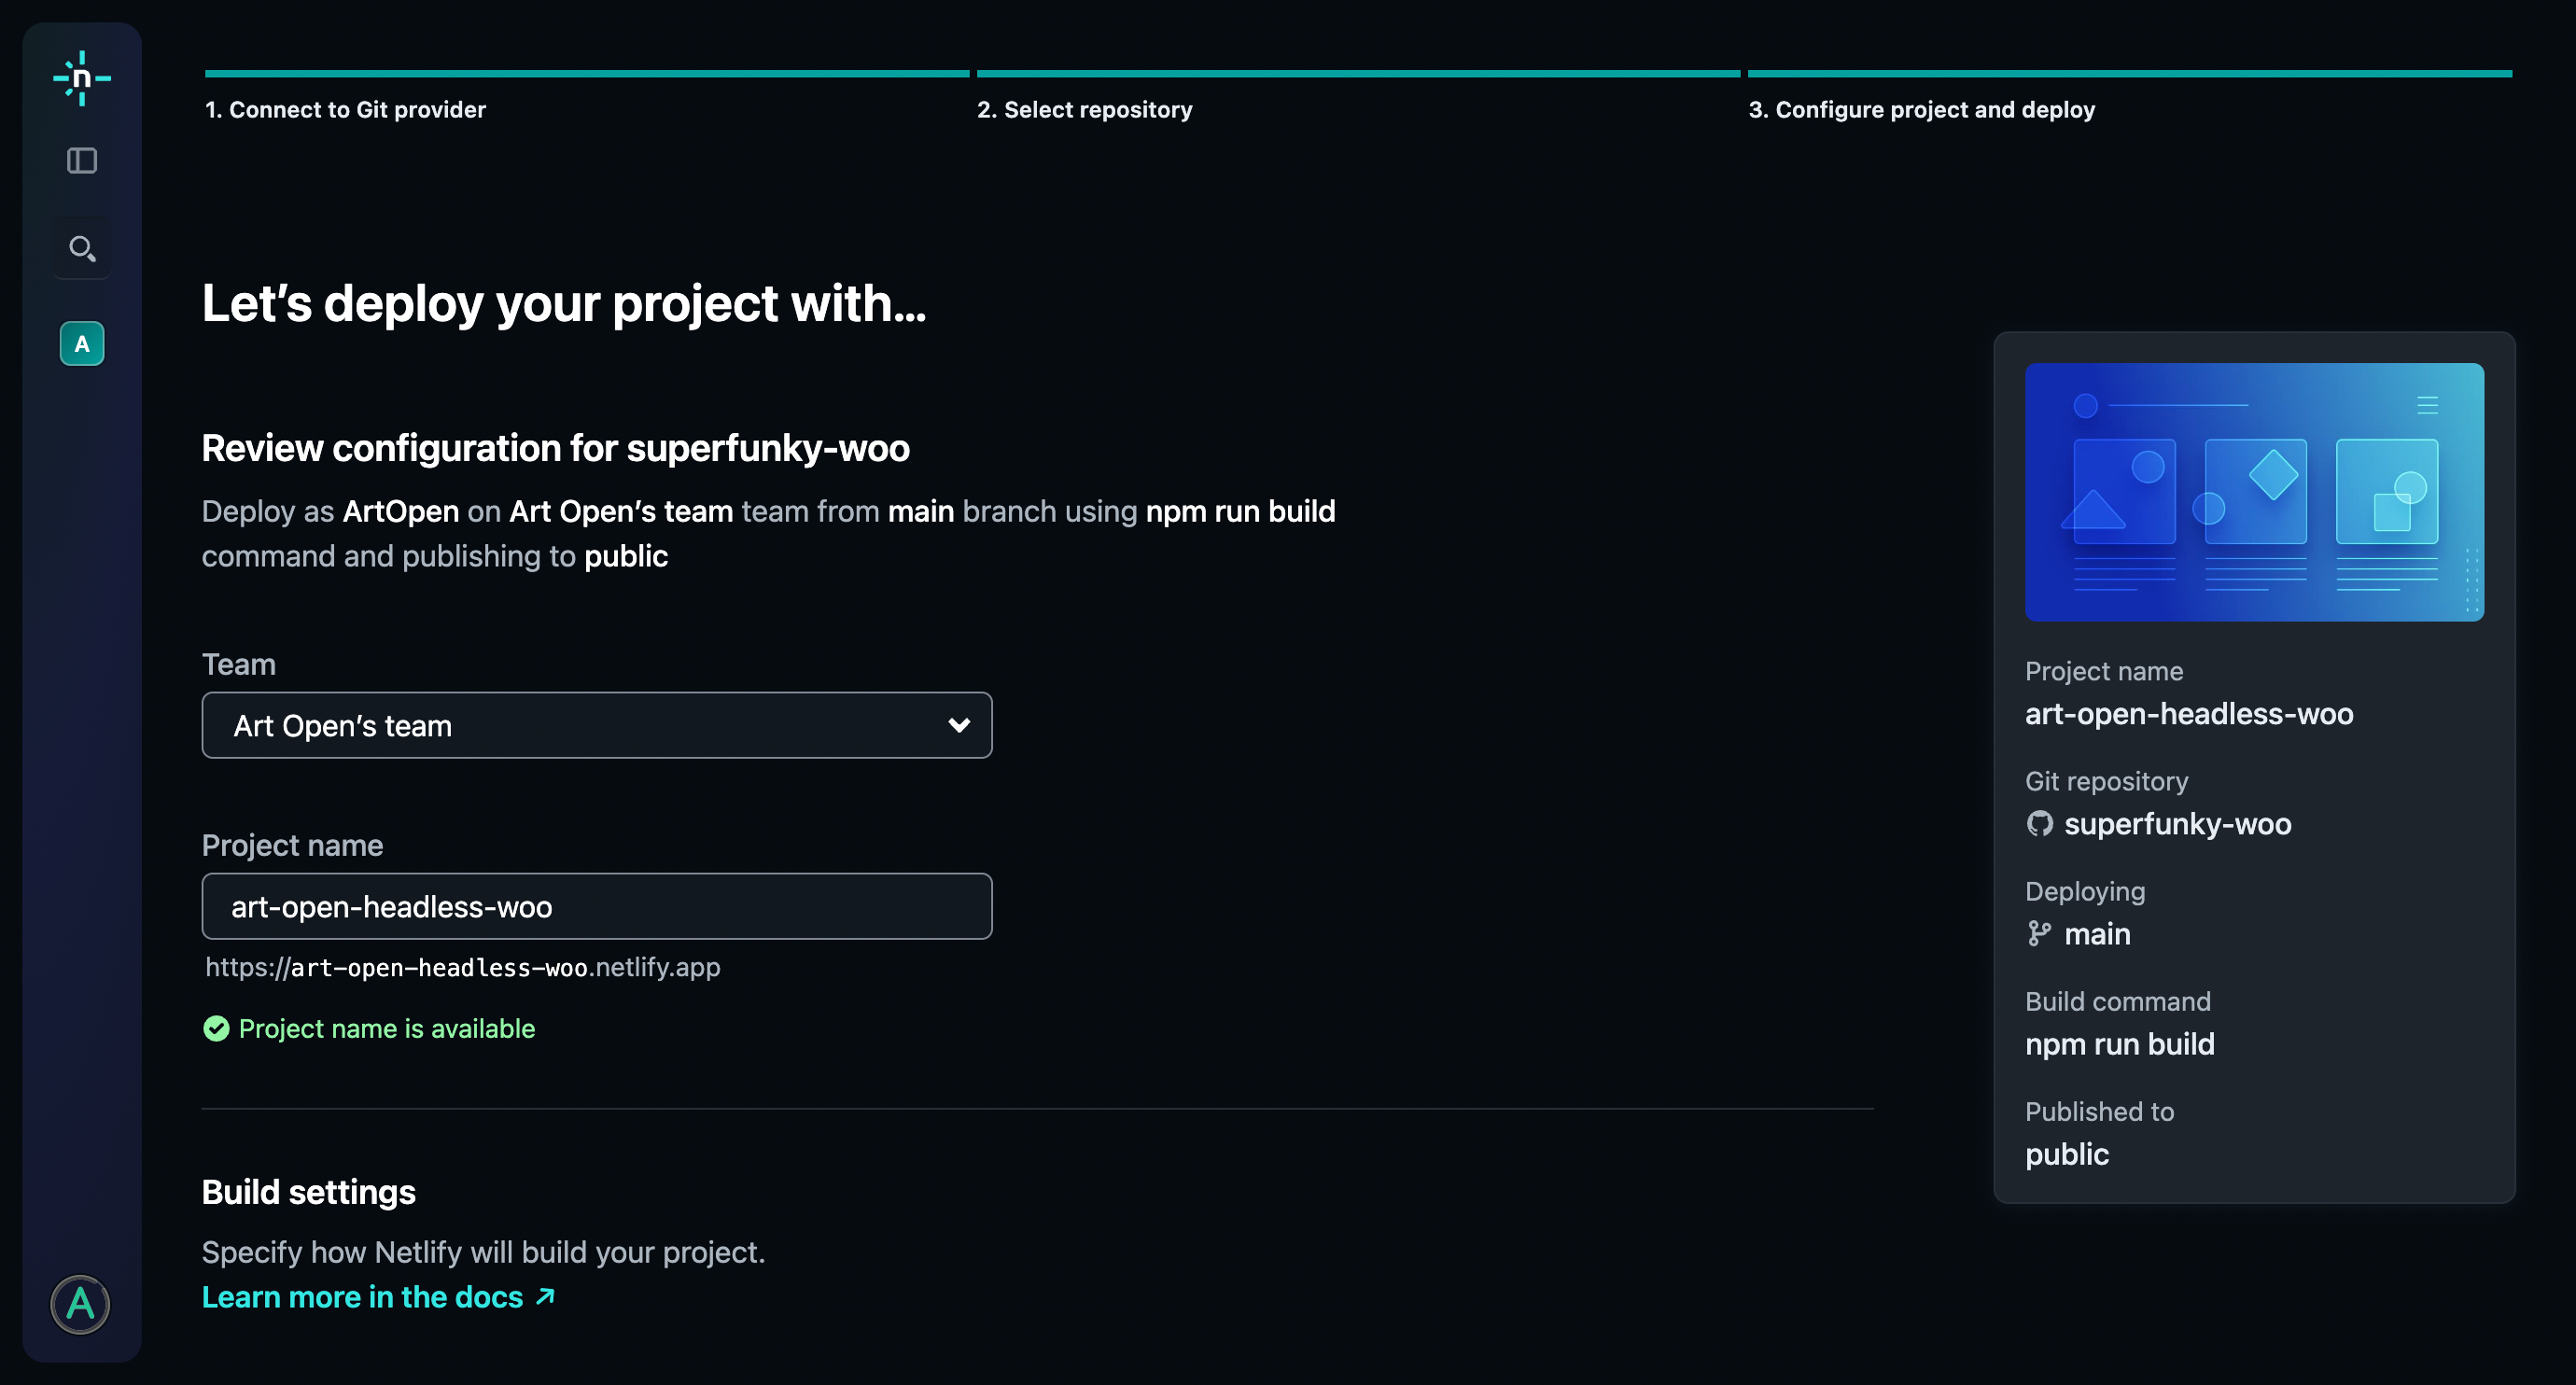
- Choose fork’s repository
- Set project’s name & settings
- Add .ENV variables and deploy
- Configure headless mods in WordPress
1. Enter netlify dashboard
2. Create a new project
3. Connect to github

4. Choose repository

5. Set project’s name & build settings
6. Add .ENV variables and deploy
GATSBY_PROJECT_NAME="your-project"
GATSBY_FRONTEND_DOMAIN=your-domain.com
GATSBY_BACKEND_DOMAIN=backend.your-domain.com
GATSBY_WPGRAPHQL_URL=https://backend.your-domain.com/graphql
GATSBY_PUBLIC_STRIPE_PUBLISHABLE_KEY=pk_live_XXX

STRIPE_SECRET_KEY=sk_live_XXX
STRIPE_WEBHOOK_SECRET=whsec_XXX
STRIPE_ID=acct_XXX
MG_API_KEY=XXXXXXXXXX

6. Configure Headless Mods settings in WordPress
This allows smoother integration between the systems.
- Build webhook
- Status badge
- Periodic rebuilds
- Frontend domain
- Discord webhook* – optional requires a valid discord channel